Sarah Peasley
Saturday AM
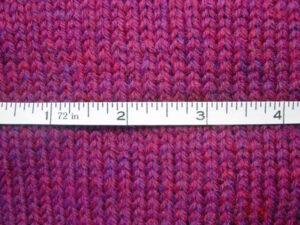
Learn to make a proper gauge swatch, measure stitch and row gauge accurately, and use this information to make a garment that actually fits.
Really? A whole class about measuring gauge?
Yes. If you want the garment to fit, you're gonna have to knit at least one gauge swatch. It really is that important, and this class will tell you why.
In this class, we'll cover basic "why"s and "how-to"s when swatching for gauge. Discussion will include different yarn, needle, and stitch choices and combinations, swatching flat vs. in the round, and tools and tips for measuring stitch and row gauge accurately over a variety of stitch patterns. Blocking will be mentioned as part of the process of swatching, but will not be discussed in depth unless time permits.
Note: This is a class about measuring stitch and row gauge accurately. For information on swatching for the perfect fabric, including yarn substitution, see Sarah's "Swatching – Finding the Right Fabric" class.
Skill Level: Any
Material fee: $0

Student Supplies:
For homework: 50 gms smooth, light-colored, worsted-weight (#4) yarn US 7 (4.5 mm) straight or circular needles
For class: US 7 (4.5 mm) straight or circular needles, 2 stitch markers, Calculator, Tape measure or ruler (both if you have them), Needle gauge
Homework:
SWATCH #1 (ribbing): With worsted-weight yarn and US 7 (4.5 mm) needles, cast on 24 sts. Next row: *K2, p2; repeat from * to end. Repeat last row until your swatch measures approximately 3” from the cast-on row. Bind off loosely in pattern. Cut yarn.
SWATCH #2 (textured stitch): With worsted-weight yarn and US 7 (4.5mm) needles, cast on 31 sts. Knit 3 rows (garter stitch border). Rows 1-40: K4, *yo, p2tog, k1; repeat from * to last 3 sts, k3. Knit 3 rows (garter stitch border). Bind off loosely. Cut yarn.
